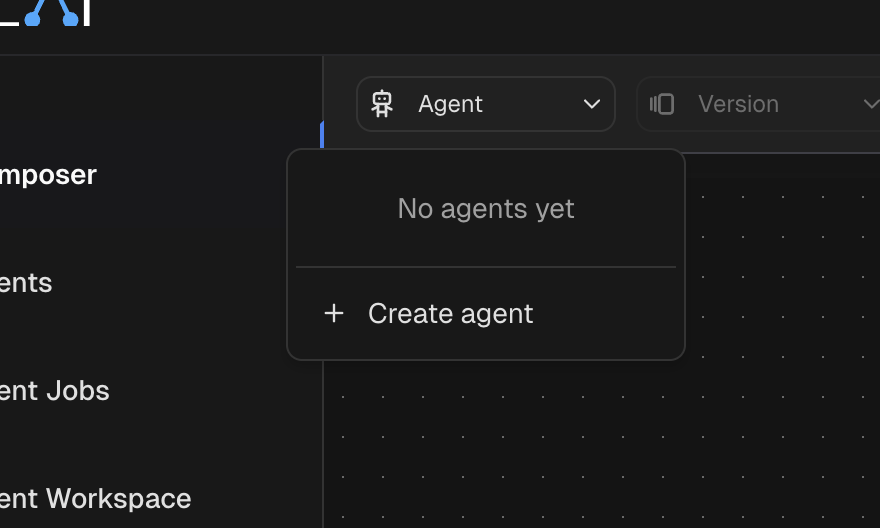
Go to the Agent Composer
Navigate to the Agent Composer on the RELAI platform. This is where you’ll build and manage your AI agents.
Create a new agent
Add nodes to the canvas
You can add nodes to the canvas by clicking the ”+” button on the top-left corner of the canvas. For this quickstart, add the following nodes:
- Chat Trigger: This node will start the agent when a user sends a message in the chat panel (found on the bottom of the screen).
- Agent: This node will process the input from the Chat Trigger and generate a response using an LLM.
- LLM: This node will provide the language model configuration for the Agent node.
Connect the nodes
Connect the nodes by dragging from an output port of one node to an input port of the next. Connect the
Chat Trigger’s output to the Agent’s input, and connect the LLM node to the Agent’s LLM config port. After connecting, your canvas should look like this: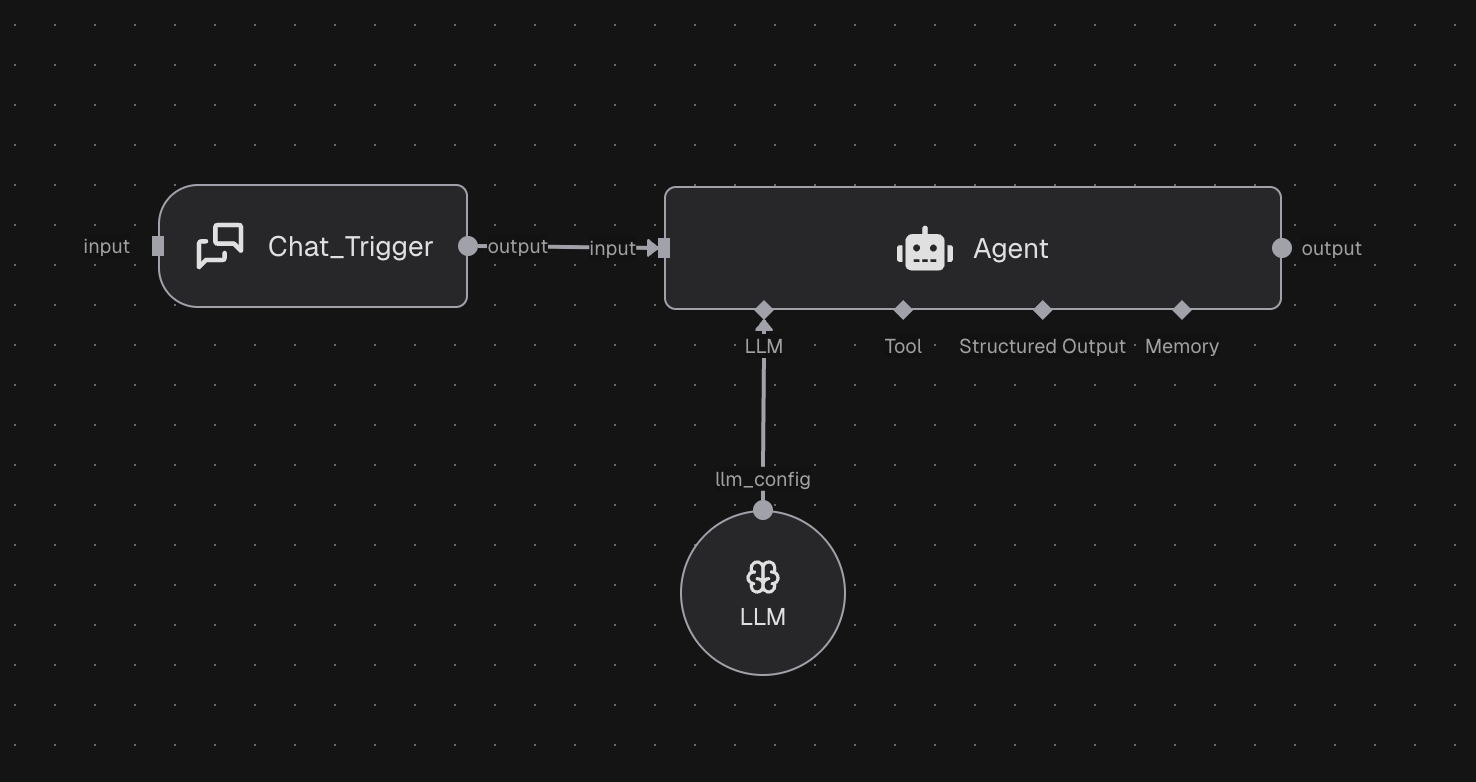
Configure the Agent node
Open the Agent node by double-clicking on it. In the parameters panel, set the parameters to desired values:
- Sytem Prompt: Enter a prompt that defines the agent’s behavior, e.g., “You are a helpful assistant.”
- Agent Input: Enter the input to the agent. To use the input from the Chat Trigger, set this to
${input}(the default value). This works because the output of theChat_Triggernode is passed as the input to theAgentnode. You can also use the expression${@Chat_Trigger.output}to explicitly reference the output of theChat_Triggernode. Read more about using Expressions in parameters.
Add LLM credentials
In the LLM node, you’ll need to add a credential that provides the API key for the language model you want to use (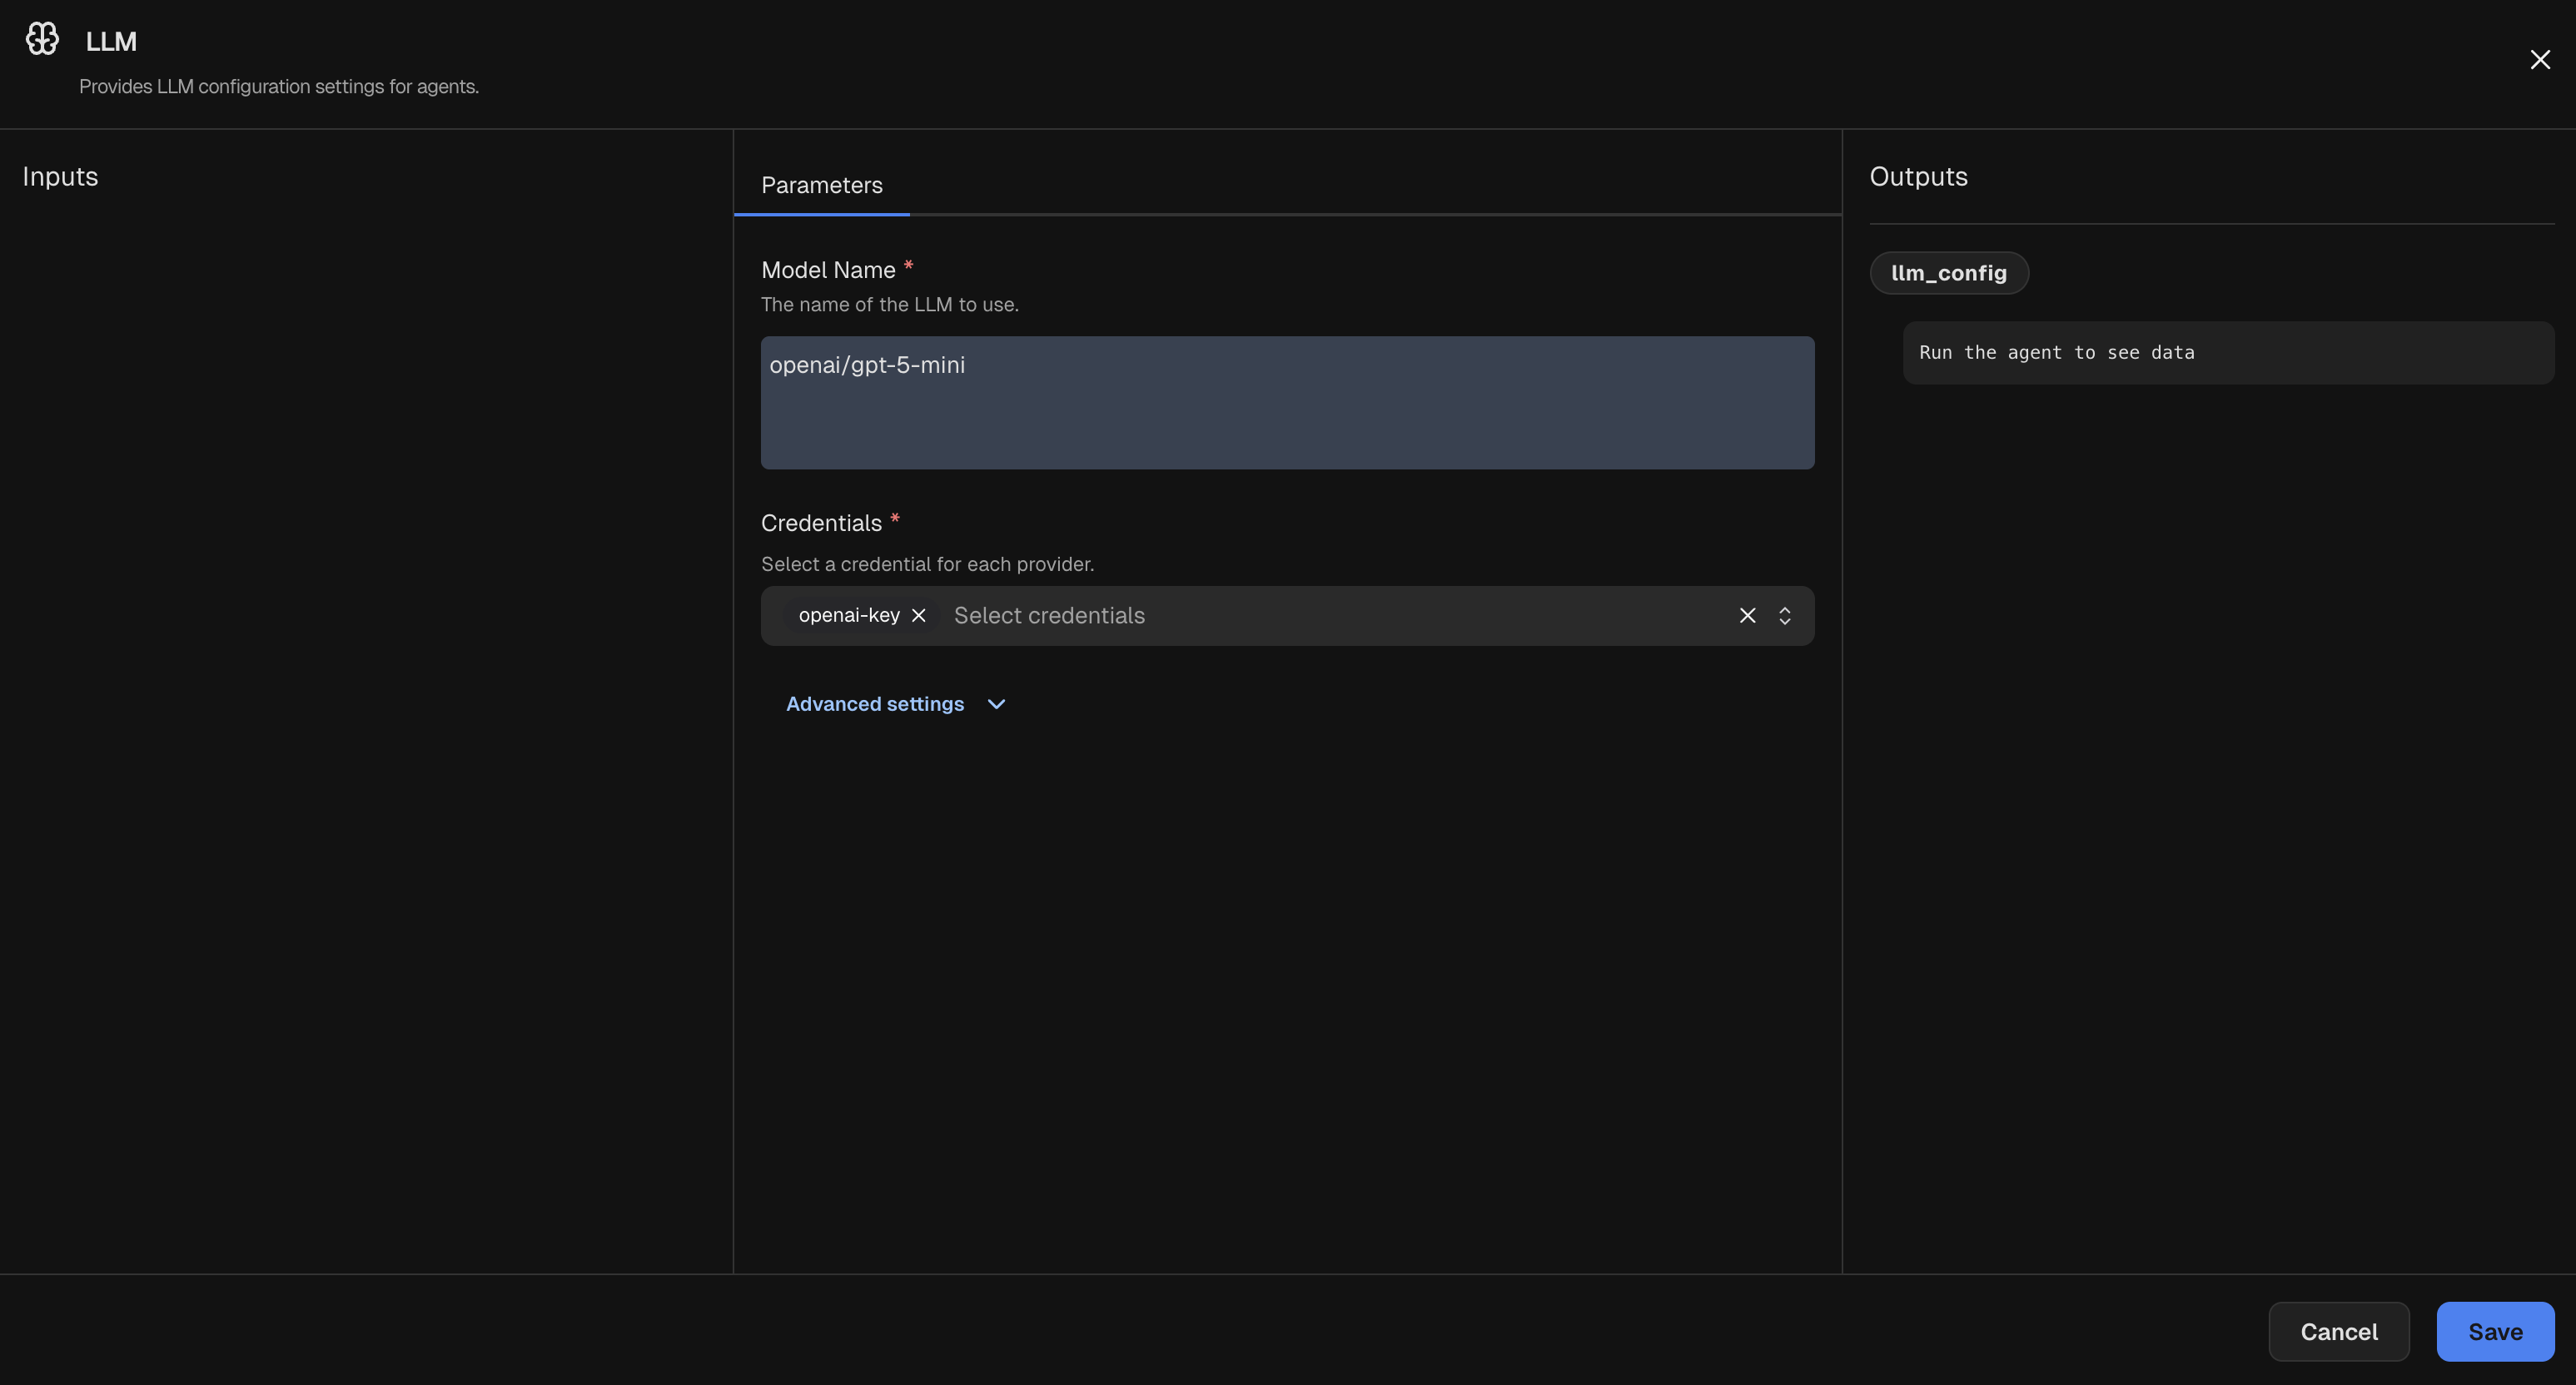
openai/gpt-5-mini by default).
Start by clicking “Credentials” in the left sidebar. Then, click “Create new credential” > “Create Simple Credential”. In the modal that appears,
give a name for your credential (e.g., openai-key) and select the credential type as LLM Credential. Set the provider to openai and enter
your OpenAI API key in the “API Key” field. Finally, click “Create”. You should see your newly created credential in the table.Go back to your agent on the Agent Composer canvas, open the LLM node, and select the credential you just created from the “Select credentials” dropdown.
The LLM node should now look like this:Chat with your agent
Now it’s time to chat with your agent! In the chat panel at the bottom of the screen, select the trigger as
Chat_Trigger.
Type a message into the input box and hit enter to send it to your agent. The Chat Trigger node will activate, passing your message to the Agent node,
which will generate a response using the LLM you configured.You should see your agent’s response appear in the chat panel shortly after sending your message. Feel free to ask it anything or have a conversation!Next Steps
Now that you’ve built and run a basic AI agent, here are some ideas for what to explore next:- Learn more about Nodes and Edges in the Agent Composer.
- Understand how to set a node’s behavior using Parameters.
- The Agent Composer supports Expressions for dynamic data handling. This is a powerful feature and unlocks a great deal of flexibility.
- Explore more advanced conceptes like Execution flow.